Getting Started in Stereo Photography

by
Steve Kiesling, Detroit Stereographic Society
The
best cue to the apparent depth of any scene comes as a result of our
"binocular vision" - the ability to instantly process the two
different views our eyes see and fuse them together into a single
"solid" image with height, width, and depth. This effect is
especially noticeable up to about 100' or so, gradually decreasing in
intensity with distance.
The
principle behind stereo or "3-D" photography is simply to simulate
our normal binocular vision, using two images which correspond to what each
eye would normally see. This
typically involves the use of a "stereo" camera, having two
identical lenses separated by a distance approximately equal to the distance
between your eyes. Two regular
single-lens cameras mounted side-by-side can also be used, by simply
activating both shutters at the same time.
And for stationary subjects, one
single-lens camera can be used, moved appropriately side-to-side to obtain the
two images. Whatever the method,
the resulting right and left pictures, when viewed so that each eye sees only
its particular image, seem to fuse into one view having all the depth of the
original scene. This technique is
unsurpassed for creating images with maximum realism and impact.
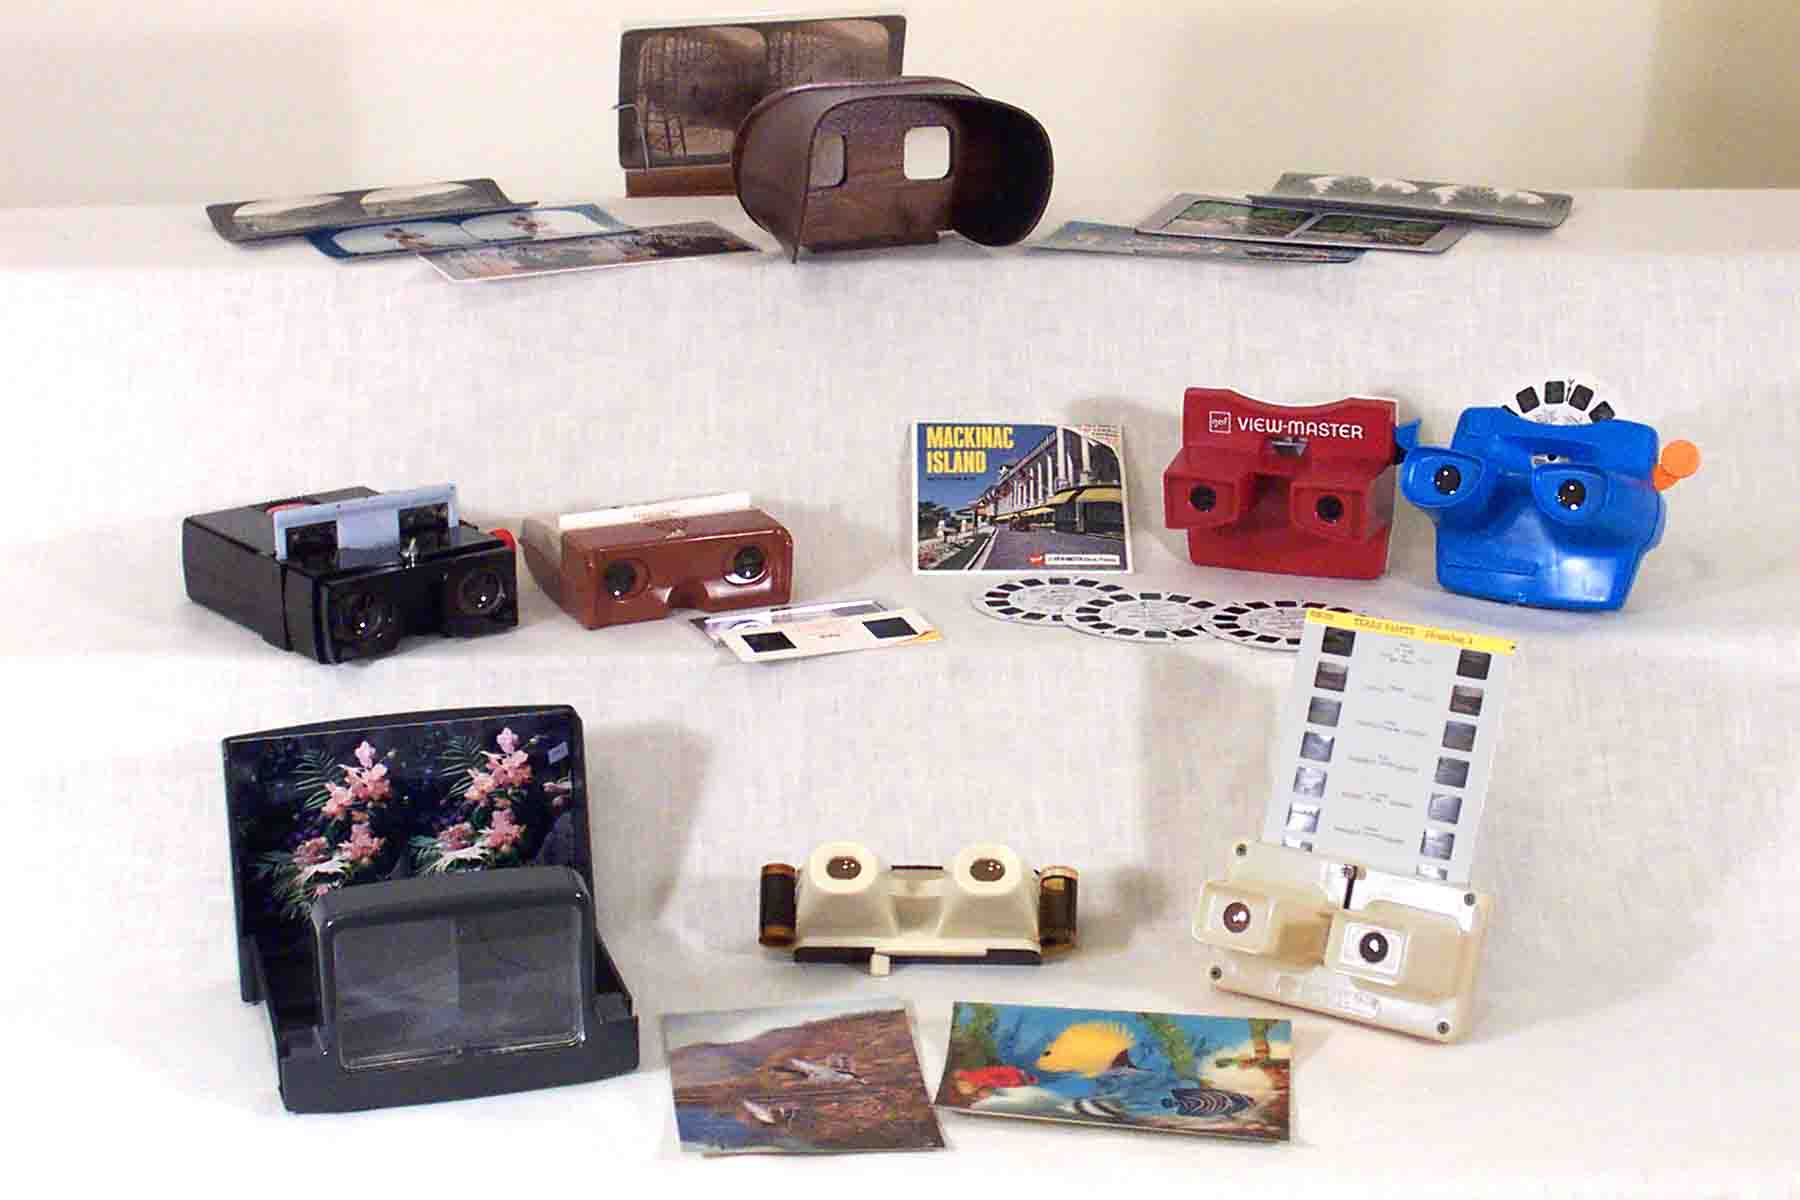
Stereo
images have been around for over 150 years.
The most popular commercially produced formats have been the stereoview
cards, lenticular prints, 3-D movies, and the View-Master reels.
In addition, amateur stereographers have made millions of their own 3-D
images, especially since the introduction of the Stereo Realist system in
1947.
The
good news is that all these formats (and more) are still available to
stereographers today, and thousands of people around the country and the world
are actively engaged in producing
Because
stereo images can be made in so many formats, one of the first steps in taking
stereo pictures is deciding what you want the finished product to be.
For our purposes here, we will concentrate only on "still
image" formats and equipment, leaving other formats such as film, video,
computer-generated 3-D and holography for another time.
Stereo Print Systems
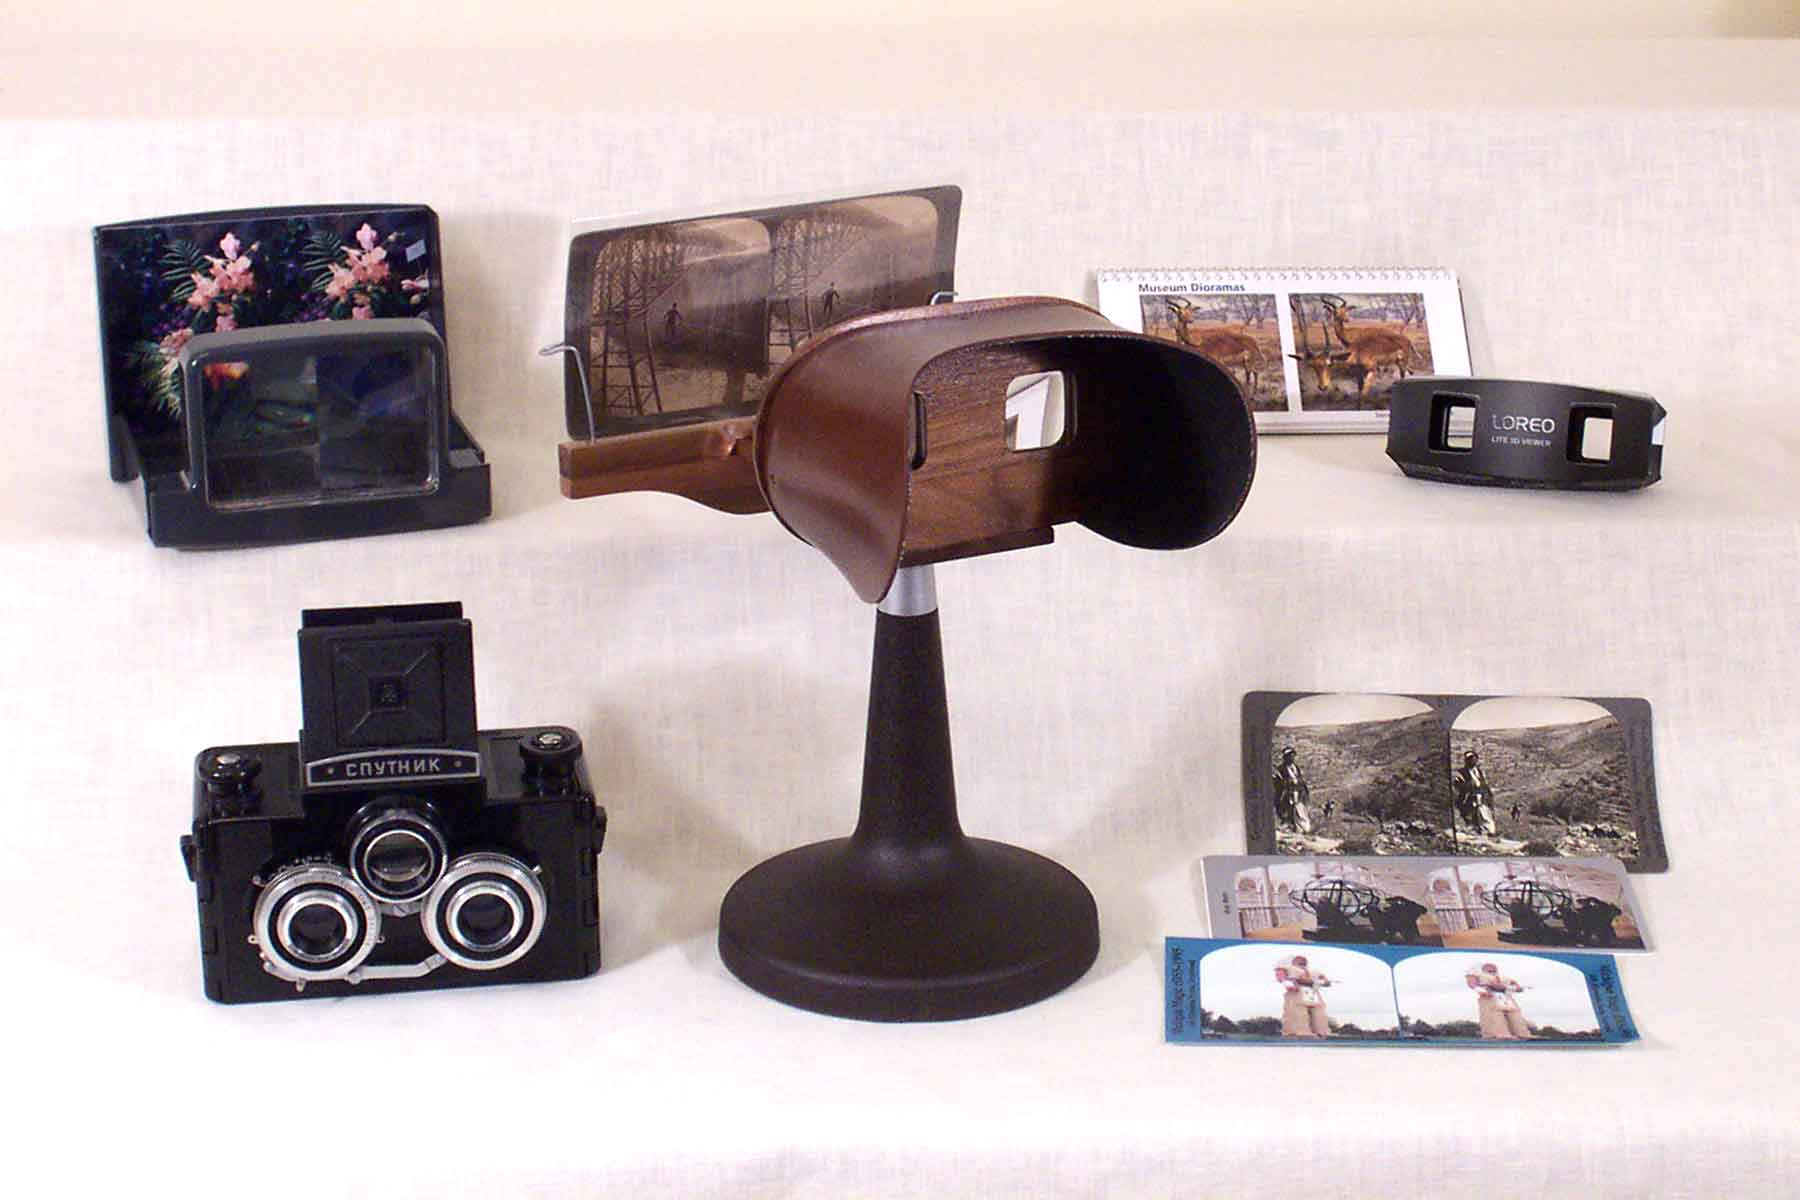
In
the print format, the most common
type traditionally has been stereoview cards, which have separate left and
right images mounted side-by-side. These
are typically viewed through a stereoscope, which has two lenses in a small
covered housing, and a wire frame on a wooden bar in front of the lenses to
hold the card. Focusing is
accomplished by sliding the card frame towards (or away from) the viewing
lenses. The most common size for stereoviews is 3-1/2" by
7"; however, both larger and
smaller cards have been produced. Commercially
produced mounting cards are available, and some view makers produce their own
custom-made cards as well. Images
for these cards can usually be made using any type of camera; however, the old
“Sputnik” and the new “3D World” medium-format stereo cameras are
particularly well-suited for making stereoviews, due to their use of 120 roll
film which produces large 2-1/4" negatives.
Stereoviews have become a popular stereo format now that computer-based
imaging has made it easy to do.
View-Magic Print Viewing System
Another
way to view stereo print pairs is with a device called the
"View-Magic" print viewer. This
inexpensive viewer uses four mirrors to allow viewing of stereo print pairs
mounted vertically, one above the other, instead of side-by-side.
The advantage of this system is that stereo prints of nearly any width
(including panoramic prints) can be very easily viewed in 3-D.
Though the View-Magic viewers are no longer in production, similar
viewers are available.
Lenticular
Stereo Prints

A
different stereo print format which has long been popular is the
"lenticular" 3-D image. These
pictures use a special printing process where extremely thin slices of the
images are aligned vertically behind a clear, finely-ridged lenticular
material. This material acts as a
lens to direct the slices of the right and left images to the appropriate eye.
A special 3- or 4-lens camera (such as the Nimslo, Nishika, ImageTech
3-D Wizard, 3-D Magic, and others) is usually required to produce the original
images, and the film must be sent to special labs for processing.
The advantage of this format is that it allows you to easily view these
images without special glasses or viewers.
Argus
Print Viewing System
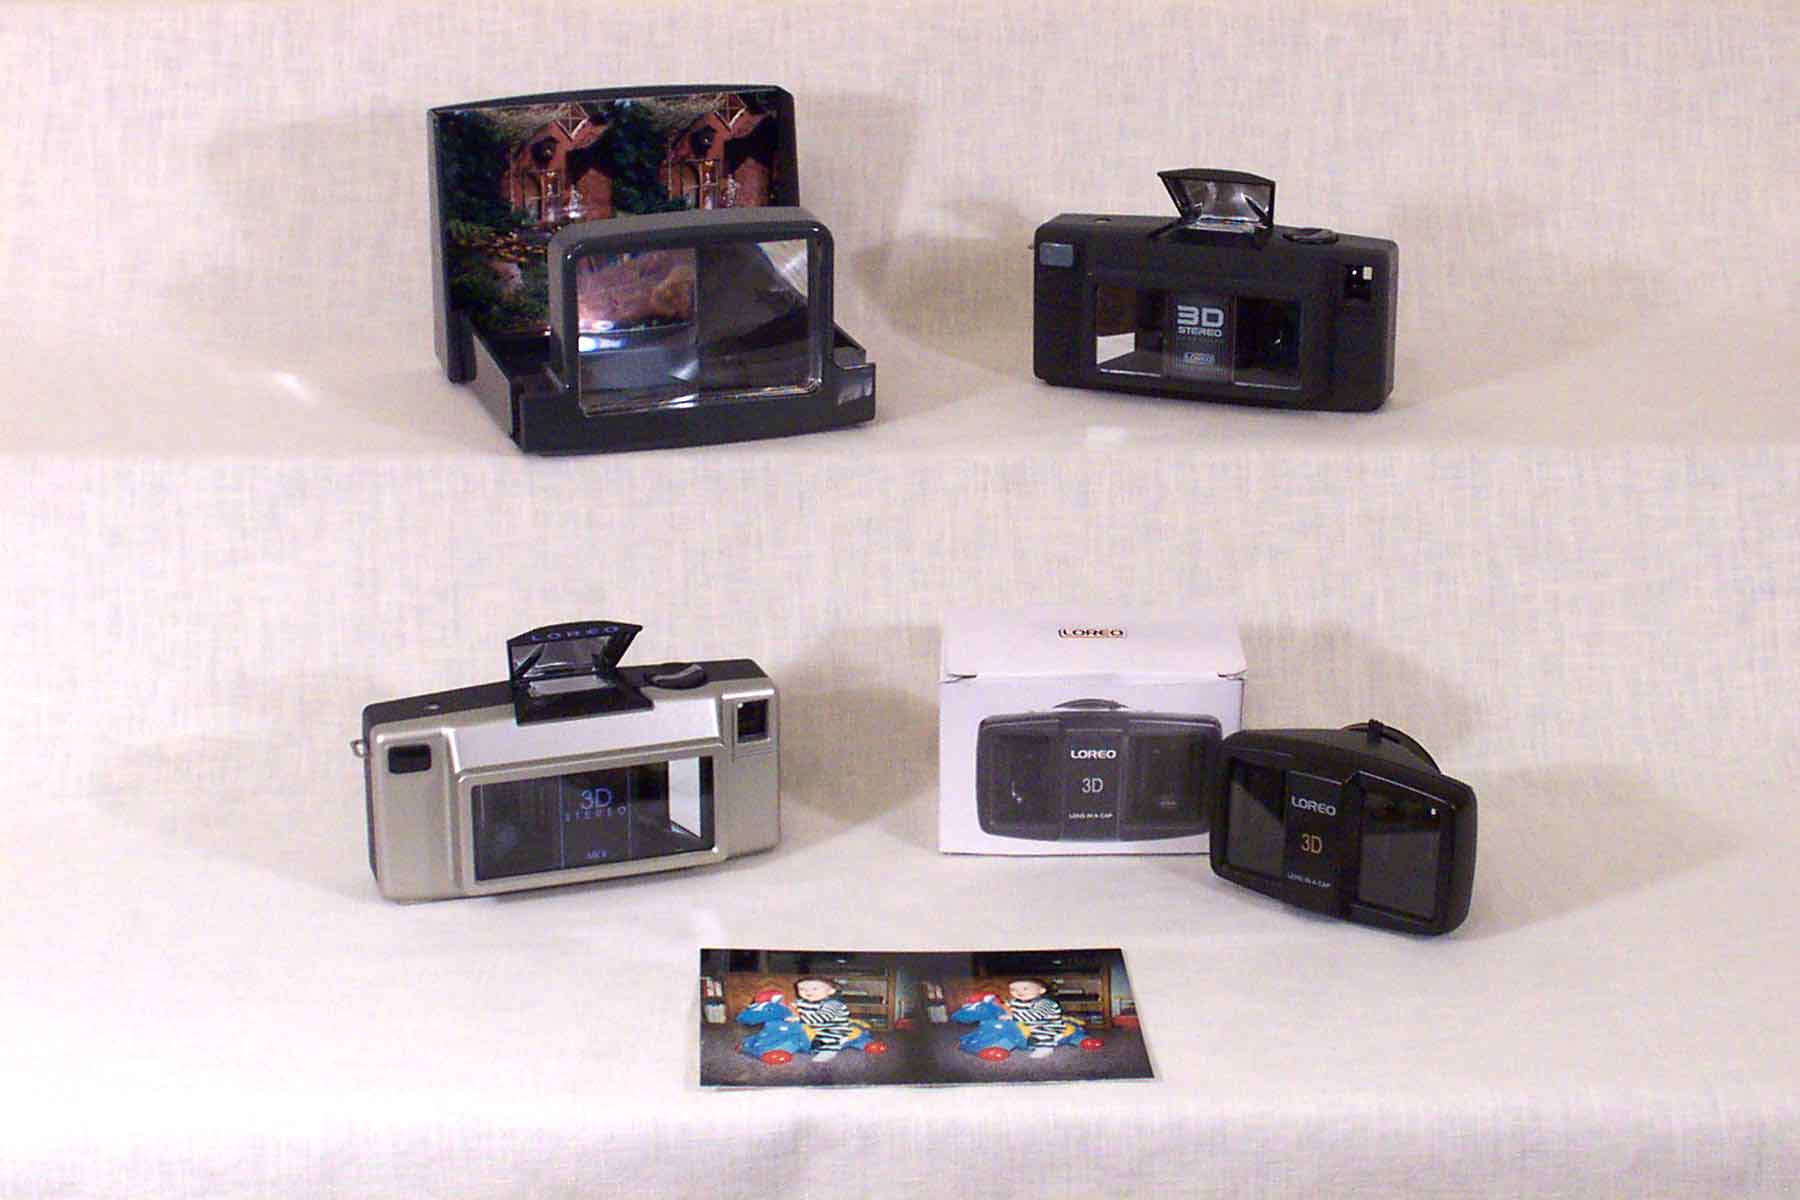
For
simplicity and convenience, this system is hard to beat.
The Argus stereo camera (also found under the “Loreo” and
Discovery” labels) uses a special mirror arrangement inside the camera and
an angled film path to take 3-D pictures that require no special processing or
mounting. Just load in a roll of
400 ASA film, decide whether you want to use the built-in flash, and shoot
away. There are no settings to
adjust, and any subject from 2-1/2' to infinity will be in focus.
Because the images are compatible with standard print processing
equipment, prints can be quickly and inexpensively made, and immediately
viewed with the included viewer. For
many people, this is an ideal way to begin making their own 3-D prints.
Stereo Slide Systems
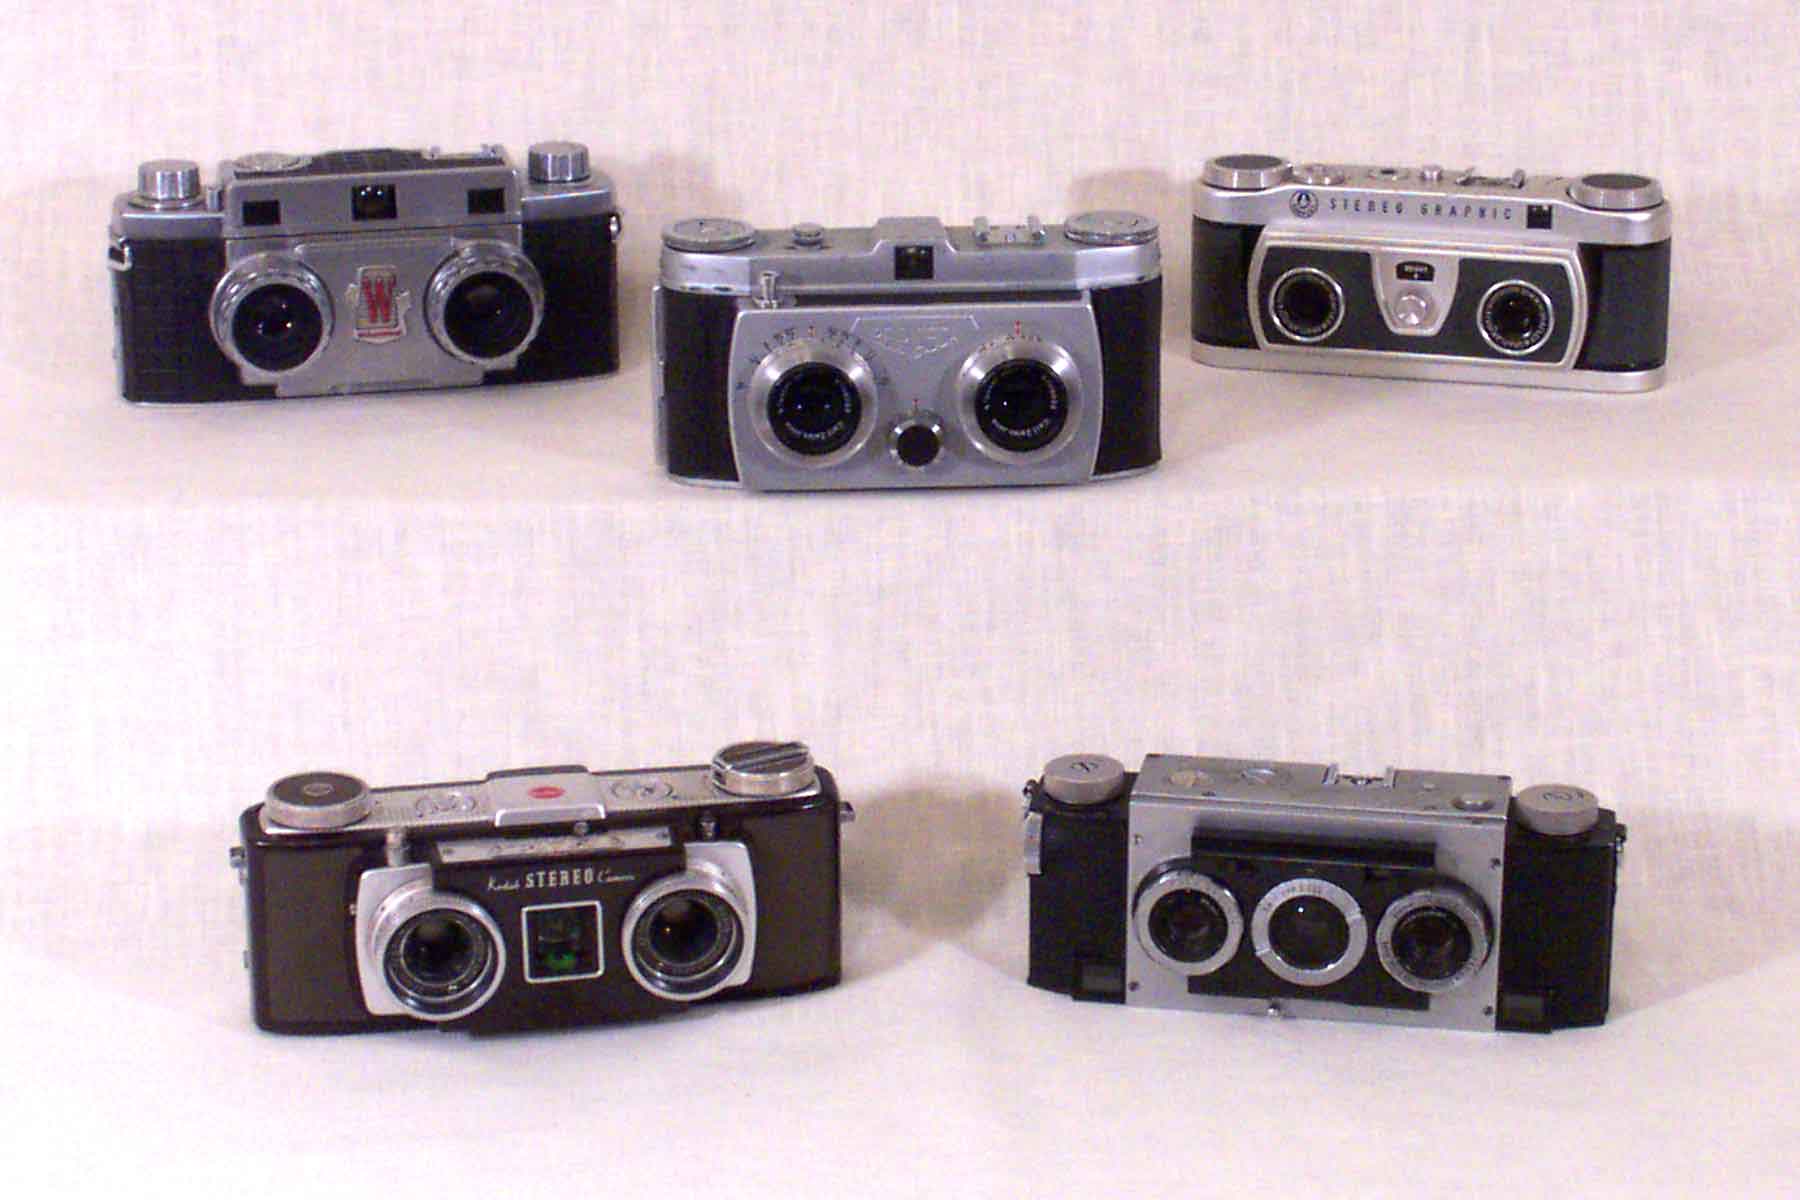
The vast majority of stereo photography since 1947 has been done in the Stereo Realist format, or a modified version of this format. This system uses standard 35mm transparency film in dual-lens cameras, and takes left and right images that are nearly square in shape. These images are then mounted in a 1-5/8" by 4" mount for viewing or projection. Over a quarter-million of these cameras were manufactured in the 50's and 60's, and many of them are still in use today. The most commonly available models are the Stereo Realist, the Kodak Stereo, the Revere 33 Stereo, and the TDC Stereo, though dozens of other cameras of this type can be found as well.
Standard
"Realist" pictures are about 5 "sprockets" wide (compared
to the standard 8-sprocket image taken by most modern cameras), and most
stereo mounting, viewing, and projection equipment has been designed for
images of this size. A few stereo
cameras have been made which produce wider (7-sprocket) images, and superb
stereo pictures can also be made using regular single-lens cameras either
alone (for stationary subjects) or "twinned".
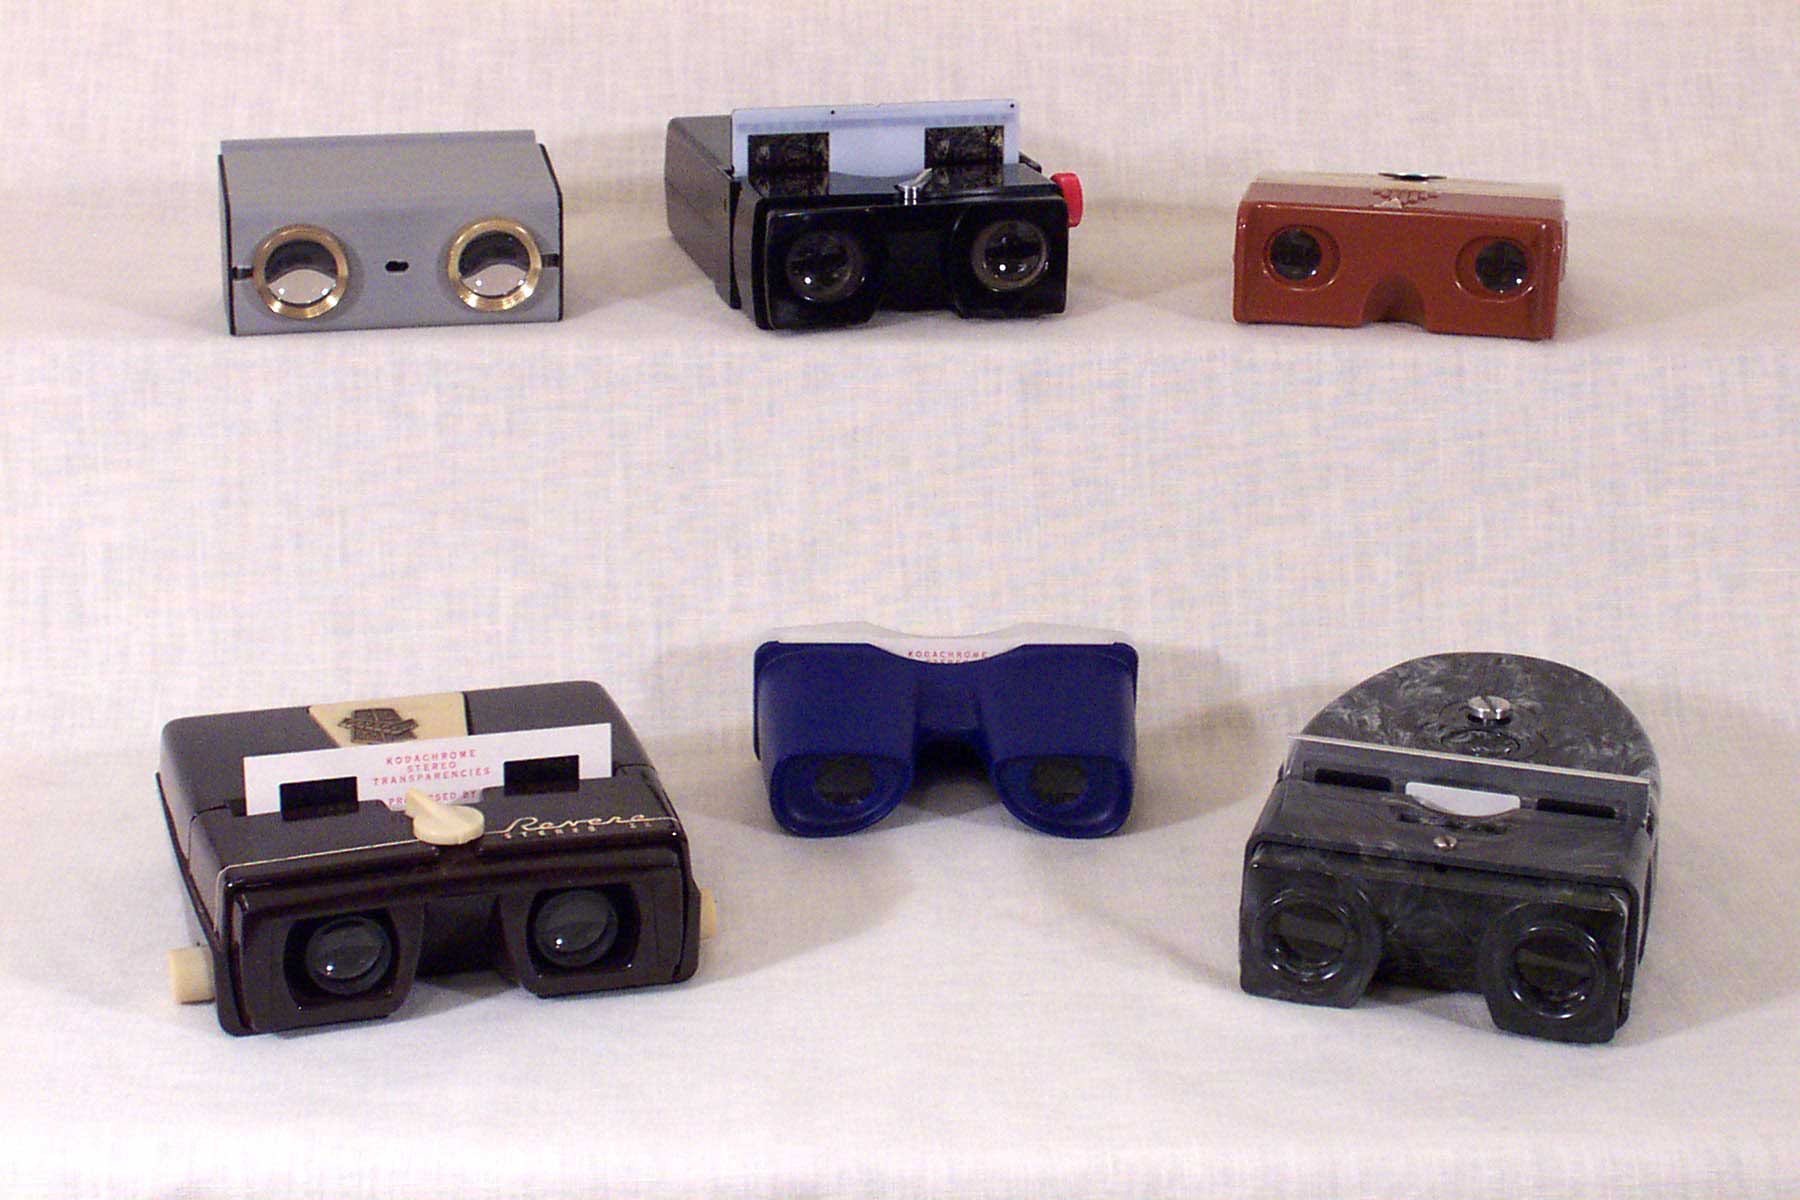
Once
your slides have been mounted, you have the option of viewing them either in a
hand-held viewer or on a silver screen, using a stereo projector.
There are many stereo hand viewers available, ranging in price from a
few dollars to well over $100. Most
have adjustable focusing and a built-in light source;
some also have glass lenses and have an interocular (eye spacing)
adjustment. The Realist ST-61
"red button" viewer is the most popular, but there are dozens of
different models available.
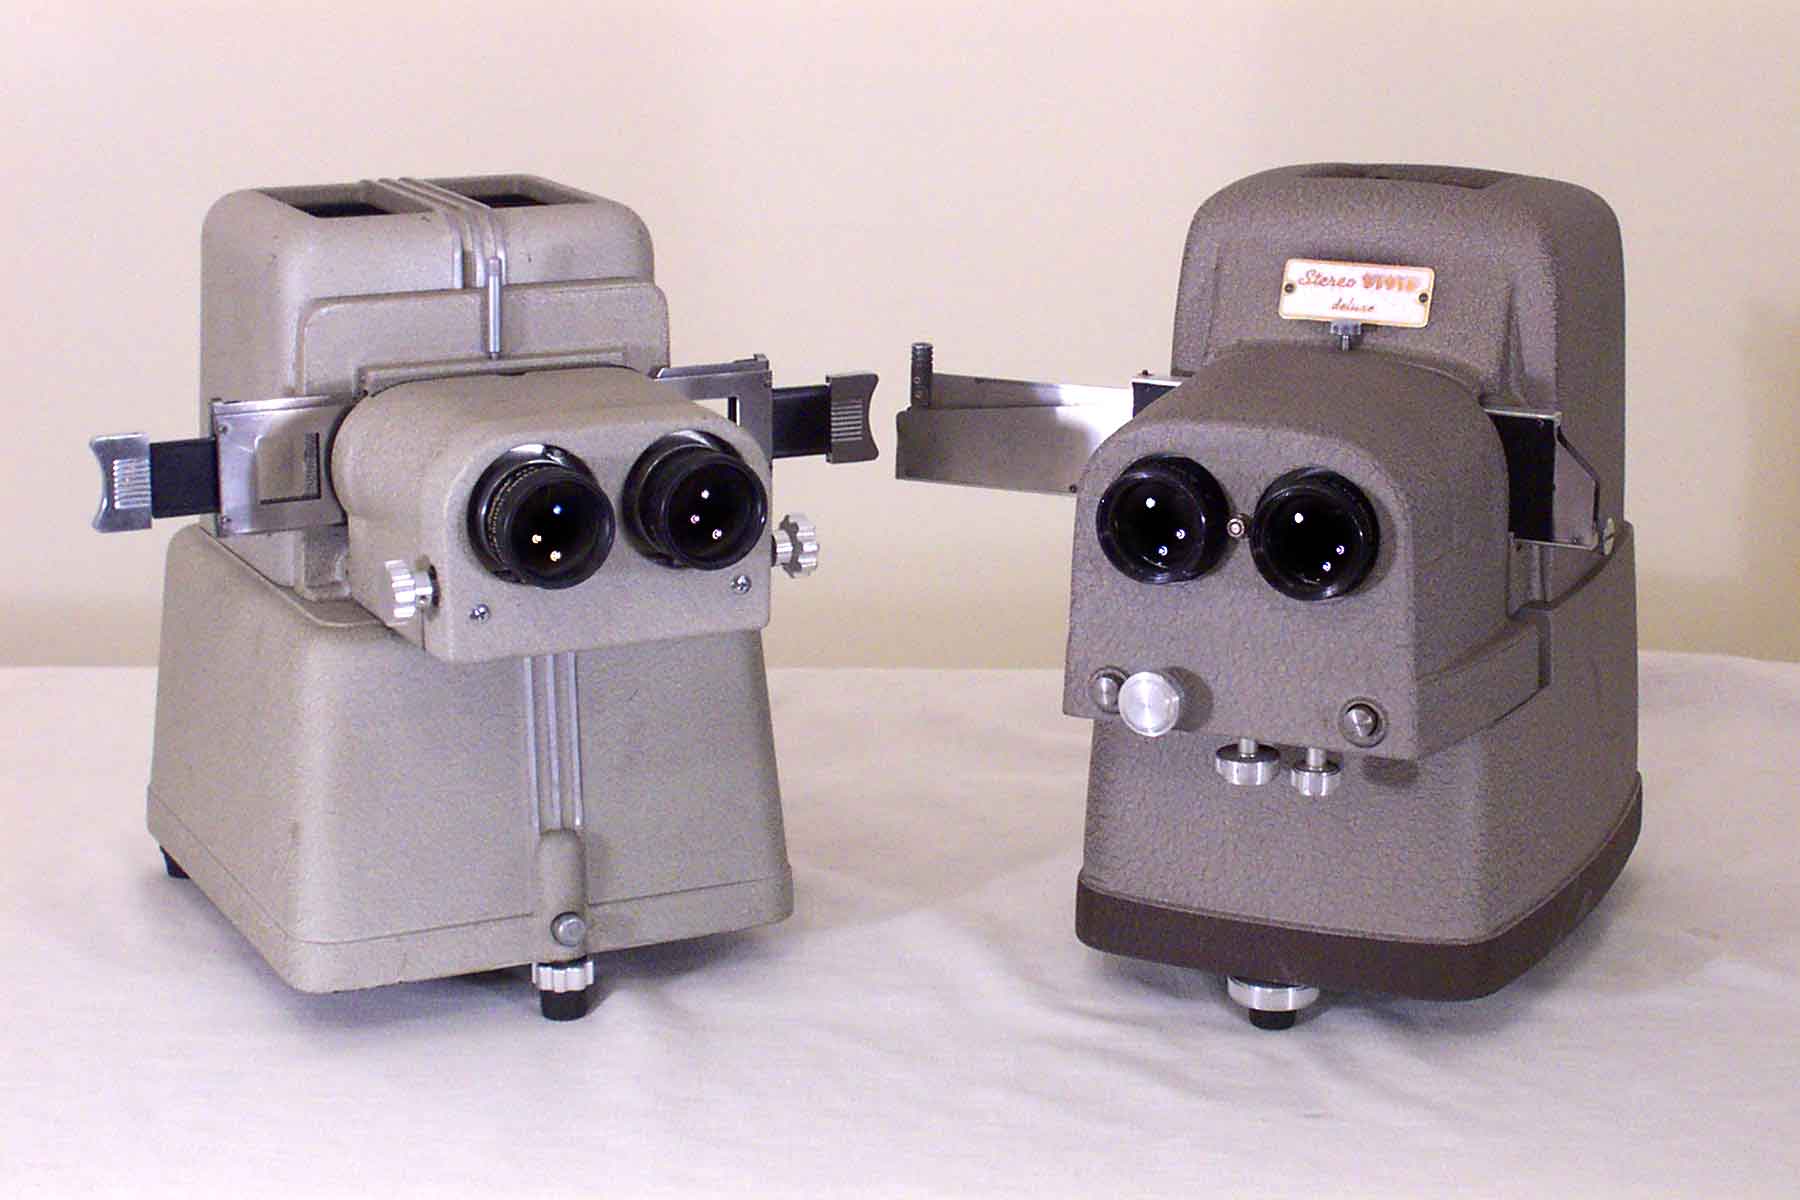
There
also are many stereo projectors to choose from, most of them costing from $200
to $450.
The
most common models are the TDC 116, the TDC 716, and the Compco Triad.
Some newer projectors are also available, but at much higher prices.
A pair of Kodak Ektagraphic III projectors can also be used for slides
in standard 2” x 2” mounts, needing only the addition of polarizers in the
light path. With any of these
projectors you must use a silver screen
(not white), and special polarized glasses.
View-Master
System
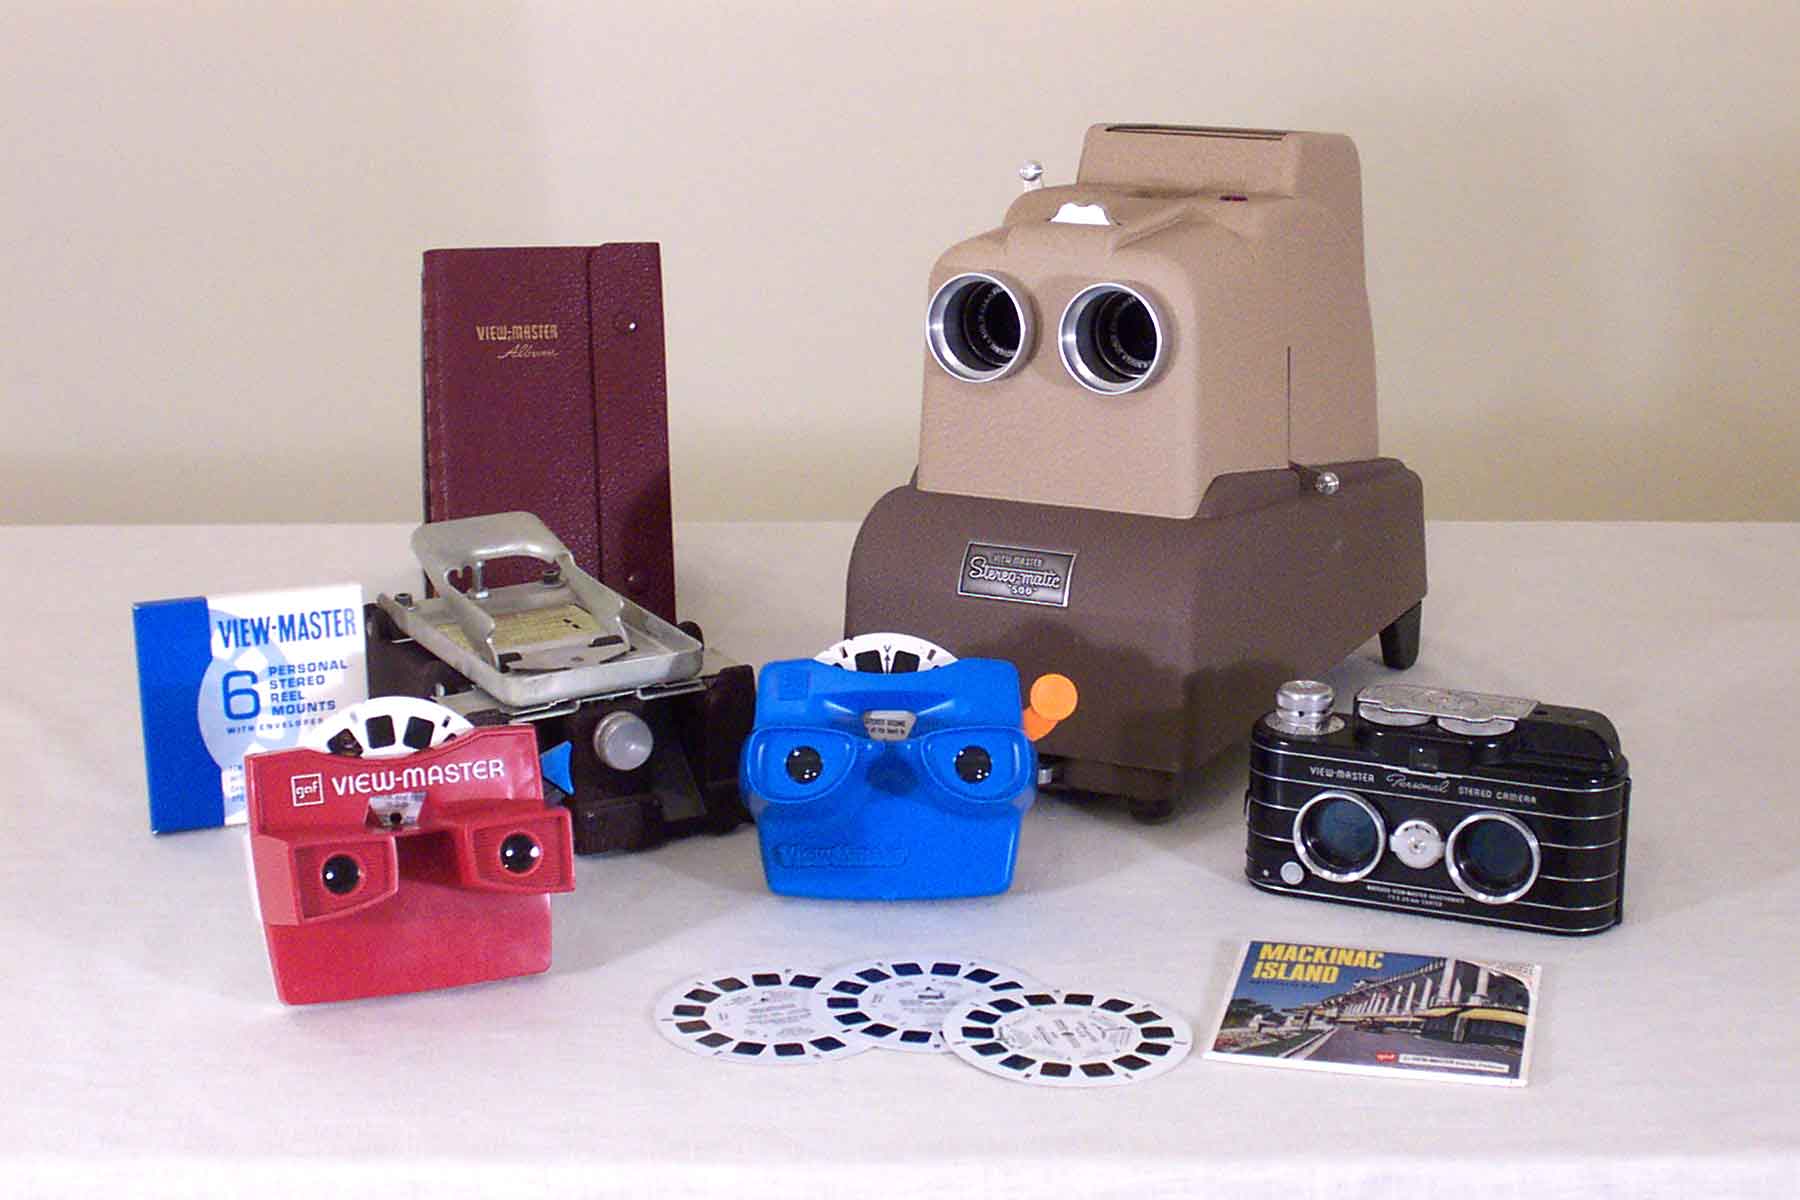
Known
around the world for the millions of commercially-produced reels, the
View-Master system is also a format for the amateur stereographer, though it
is not as popular as the other systems already mentioned.
Two cameras in particular - the View-Master Personal and the
View-Master Mark II - were manufactured for the purpose of making your own
personal reels. Both cameras use
standard 35mm film. Blank reels
and insertion tools are available (though not always easy to find), but a
special film punch is required which is fairly expensive (currently around
$300). If you do not take enough
pictures to justify the purchase of a punch, one alternative is to send your
film to a mounting service and have this done for you.
View-Master reels can be used in any of the View-Master viewers, or
projected using the View-Master Stereomatic 500 projector.
Again, a silver screen and polarized glasses are required when
projecting these reels in stereo.
Taking Stereo Pictures
As
you begin taking stereo pictures, you will find there are some differences in
the way you approach stereography compared to regular planar photography.
For example, you will want to compose your pictures to take advantage
of the depth you are now able to show. One
rule of thumb is that a good stereo image will contain at least three planes
of depth; fore-ground, middle-ground, and back-ground (the more planes, the
better). For best results, keep the range of depth in your scene approximately
within the range of depth available for a lens aperture of
f 8, even though you may be actually using a different aperture size.
Another
difference is in the way you adjust your focus, aperture, and shutter speed
settings. In stereo photography
you will usually want to obtain the maximum depth-of-field possible, since
pictures that are sharp from front to back help to maintain the realism of the
scene. As a result, your lens
openings (f-stop settings) will tend
to be higher (f 5.6 to f 11), and your shutter speeds a little lower (1/100 sec. or so);
the exact settings depending of course on the amount of light available
and the sensitivity of the film you use.
It is usually best to select films with a minimum of "grain"
to help reinforce the realism of the picture.
This
larger depth-of-field makes the exact setting less critical;
however, it is a good idea to take advantage of the "hyperfocal"
markings on the camera to obtain the maximum sharpness over the widest
possible range. These markings
are typically on the side of the lens or on the focusing dial, and show the
range of distances which will be in focus for a particular focus setting at
different
f-stops.
For example, if you set your focus at the hyperfocal distance of 20' at
an aperture of f 8, everything between 10' and infinity will be in focus.
If the most distant part of your image is only 20' away - say, for an
indoor picture - setting the focus at 10' (again at f
8) will give you a sharp image from 6'8" out to 20'.
These distances can also be obtained from depth-of-field or hyperfocal
tables. Using this information
can help you to maximize the sharpness and realism of your 3-D pictures.
Tips for using Stereo
Cameras for 3-D
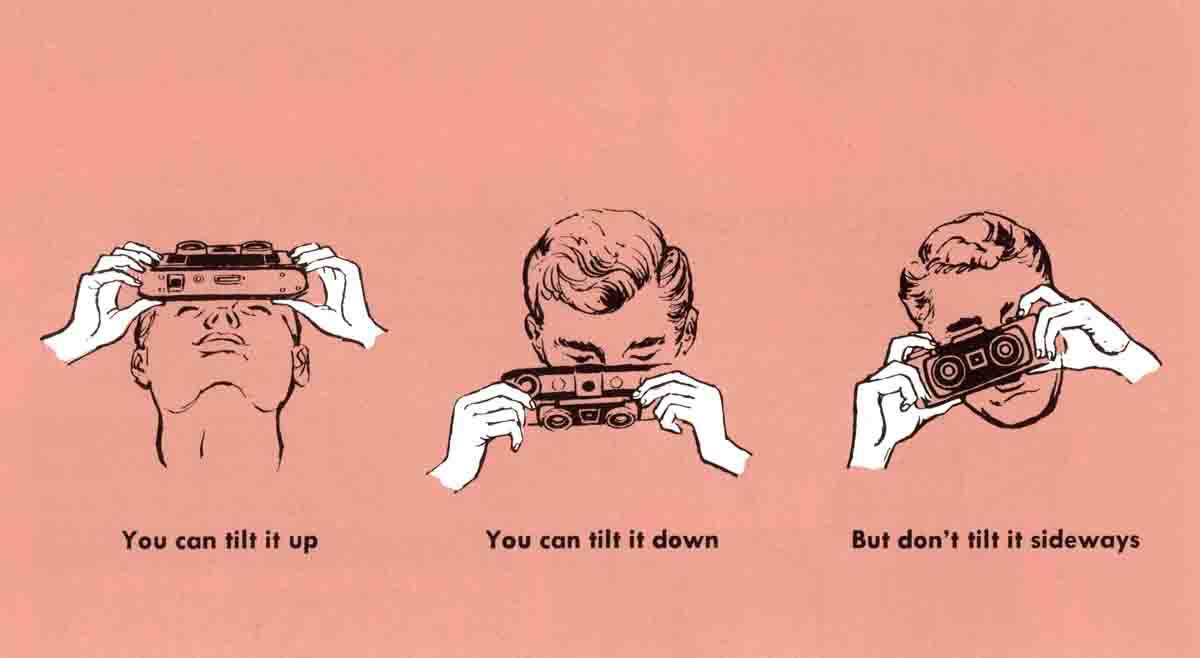
When
you are using a stereo camera, it is important to keep the camera level from
side to side (it’s okay to aim it either up or down).
Some cameras have a built-in bubble level to help with this.
Your
nearest subject should generally be no closer than about 7', especially if your
image will extend out to infinity. If
you want an object to appear to come "into the audience", it should be
closer than 7'; however, you should
compose your picture so this object doesn't "touch" the edges of the
frame within about 10' from the camera. If
the most distant part of your scene is 20' or less (as with an indoor picture),
the nearest subject can be as close as 4" away.
Some
stereo cameras will exhibit "vignetting" or darkening of the image
corners with apertures of
Using
a light meter is also a good idea for getting the best exposures, particularly
when using slide film. Most of
these cameras have no built-in metering capability.
Most
stereo cameras have some type of internal marking system to help identify the
left and right images, called "witness marks".
A good way to do this, however, is simply to check the frame numbers on
the edge of the film - the right image will almost always have the lower
number.
Tips for using
Single-Lens Cameras for 3-D
If
you use one or more single-lens cameras for stereo, you'll have a lot
of flexibility with respect to lens focal lengths and "interocular"
distances between the two images. In
many cases an SLR camera is preferred for stereo pictures of very close and very
distant subjects. Several
"slide-bars" and adjustable platforms are available for taking
pictures with base distances different than that of a standard stereo camera. Take extra care to keep the heights of the left and right
images in their mount exactly the
same, and make sure there is no "twist" in either picture (this
applies to "twinned" camera setups as well).
And be sure the only thing that moves during the time between taking the
left and right images is your camera! This
includes cars, water, flags, passing airplanes, etc. - any object that appears
in the image area. If you use a
flash, it must also remain stationary and be separated from the camera.
Summary
Stereo
photography is a fascinating and powerful visual medium.
It is simple enough that anyone with any
camera can get started in it, and sophisticated enough that you can spend a
lifetime exploring it's intricacies. It
is very rewarding on its own; and
for those who enjoy the challenge of competition, there are many opportunities
available for you to test your skills.
There
are many good sources of additional information on stereo photography.
Organizations such as the National Stereoscopic Association, the
International Stereoscopic Union, and the Photographic Society of America all
have a lot to offer anyone interested in stereo photography.
If
you have internet access, I encourage you to log onto the web site www.stereoscopy.com
and explore the many 3-D related links listed there.
The
Detroit Stereographic Society meetings are a great place to see and learn about
stereo, and you’ll want to visit their web site, www.Detroit3D.org,
too.
I
hope this information will help encourage you to try your hand at stereo
photography.
If
there is anything I can do, please send an e-mail message to me at Steve.Kiesling@att.net,
or give me a call at (734) 595-0245, and let me know how I can help.
This page was last updated on 03/08/2008.
Copyright © 2001-2008 Detroit Stereographic Society. All
rights reserved.